Puffer Dashboard
The Puffer Dashboard provides an interface for users to:
- Prepare Coral-CLI command to generate their validator registration payload
- Mint pufETH and Validator Tickets
- Register their validator
- View their validators
The Puffer Dashboard UI is subject to change as more features are added
Registering a Validator
Step 1: Setup Wallet
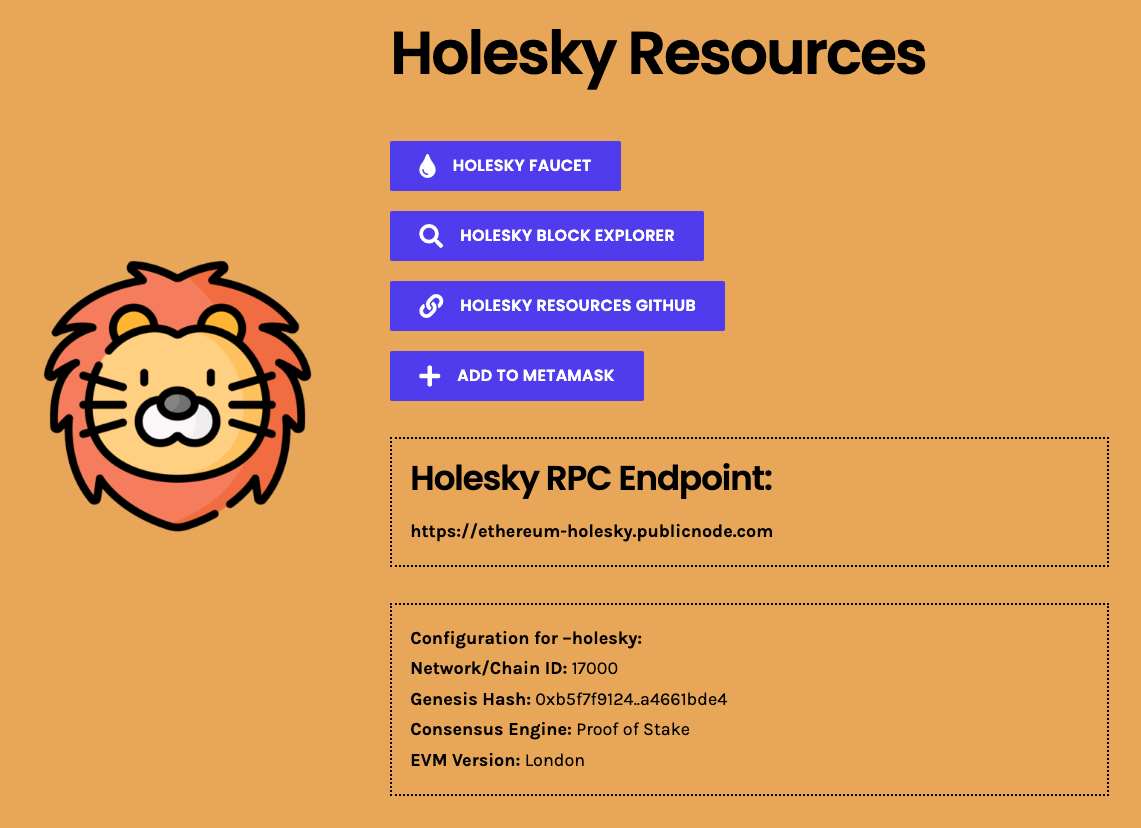 Follow the instructions, to add the Holesky network to your wallet.
Step 2: Get Coral-CLI Command
Navigate to https://launchpad.puffer.fi/Setup to copy the Coral-CLI command.
Make sure your wallet is set to the Holesky network.
Run the command where you installed the Coral-CLI.
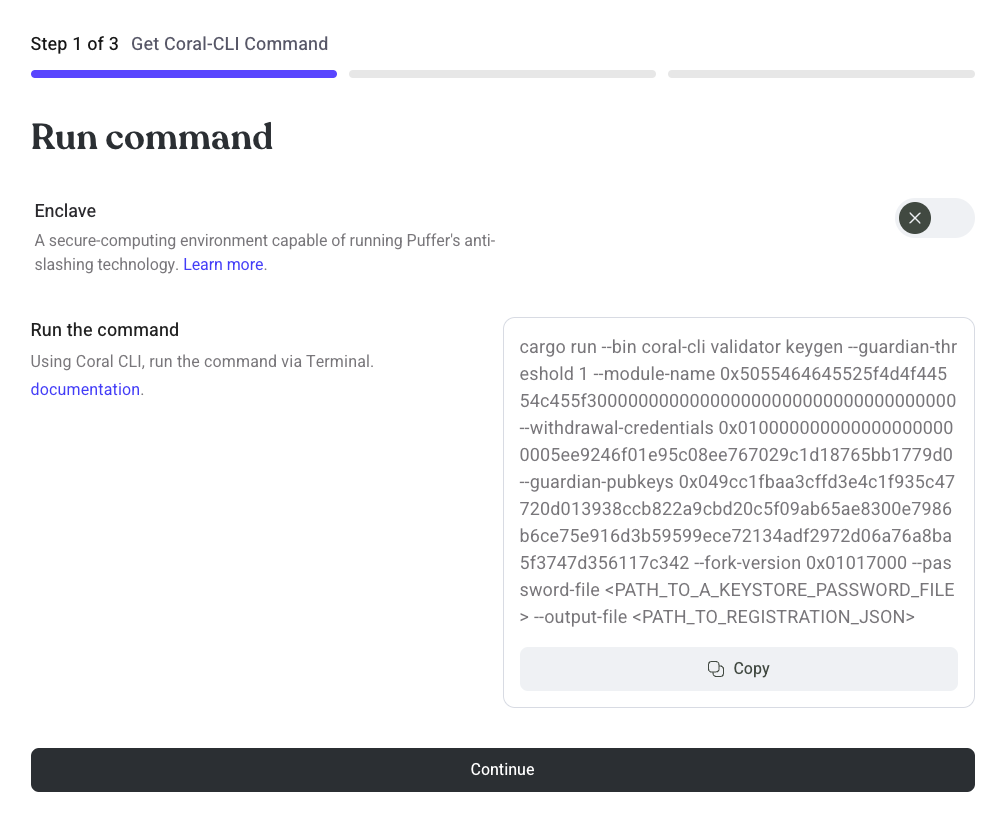
Without Enclave
- Copy the displayed command
- Edit
<PATH_TO_A_KEYSTORE_PASSWORD_FILE>and<PATH_TO_REGISTRATION_JSON>
The following example command will create a local validator keystore file in the ./etc/keys/bls_keys directory. The keystore is encrypted using the password contained in password.txt. The command will create a registration payload called registration.json.
cargo run --bin coral-cli validator keygen --guardian-threshold 1 --module-name 0x5055464645525f4d4f44554c455f300000000000000000000000000000000000 --withdrawal-credentials 0x0100000000000000000000005ee9246f01e95c08ee767029c1d18765bb1779d0 --guardian-pubkeys 0x049cc1fbaa3cffd3e4c1f935c47720d013938ccb822a9cbd20c5f09ab65ae8300e7986b6ce75e916d3b59599ece72134adf2972d06a76a8ba5f3747d356117c342 --fork-version 0x01017000 --password-file password.txt --output-file registration.json
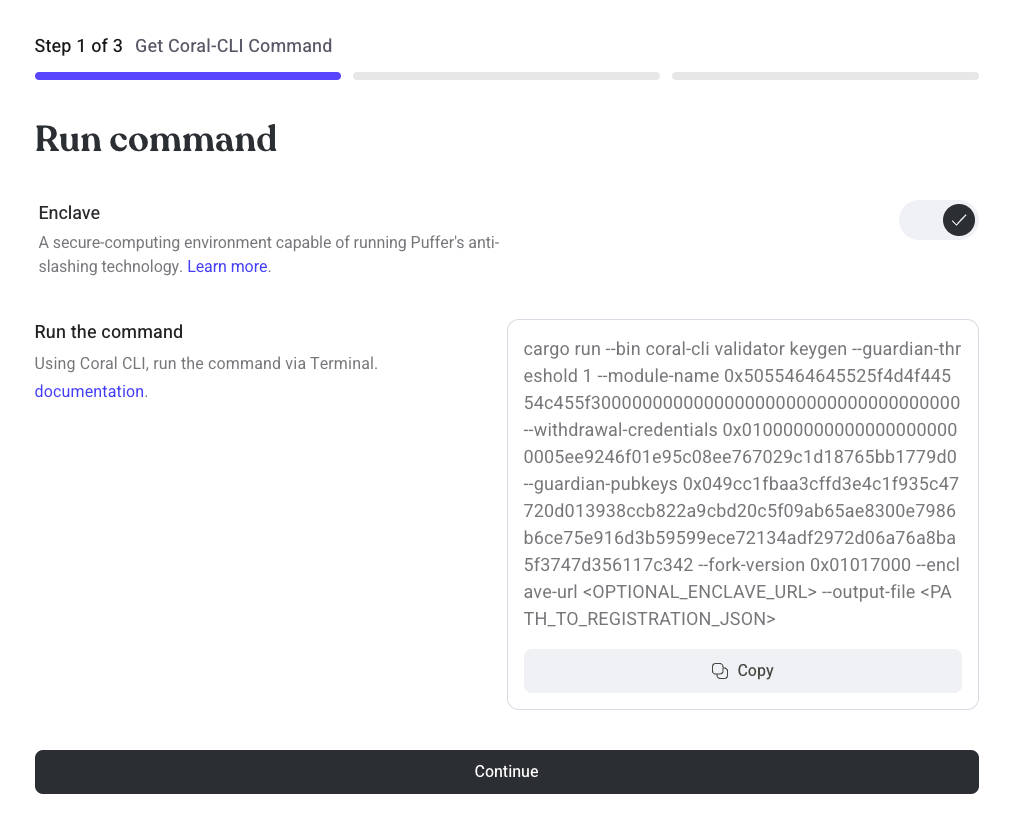
With Enclave
- Copy the displayed command
- Edit
<OPTIONAL_ENCLAVE_URL>and<PATH_TO_REGISTRATION_JSON>
The following example command will create a validator key using the enclave running at http://localhost:9001 and create a registration payload called registration.json. See (here) to setup your enclave.
cargo run --bin coral-cli validator keygen --guardian-threshold 1 --module-name 0x5055464645525f4d4f44554c455f300000000000000000000000000000000000 --withdrawal-credentials 0x0100000000000000000000005ee9246f01e95c08ee767029c1d18765bb1779d0 --guardian-pubkeys 0x049cc1fbaa3cffd3e4c1f935c47720d013938ccb822a9cbd20c5f09ab65ae8300e7986b6ce75e916d3b59599ece72134adf2972d06a76a8ba5f3747d356117c342 --fork-version 0x01017000 --enclave-url http://localhost:9001 --output-file registration.json
Fetching the registration payload
If you ran the Coral-CLI on a remote server you can fetch the registration payload by substituing your information in the following command:
scp your-server@XX.XXX.XXX.XX:/path/to/coral/registration.json ~/my/local/computer/registration.json
Step 3: Mint pufETH or VTs
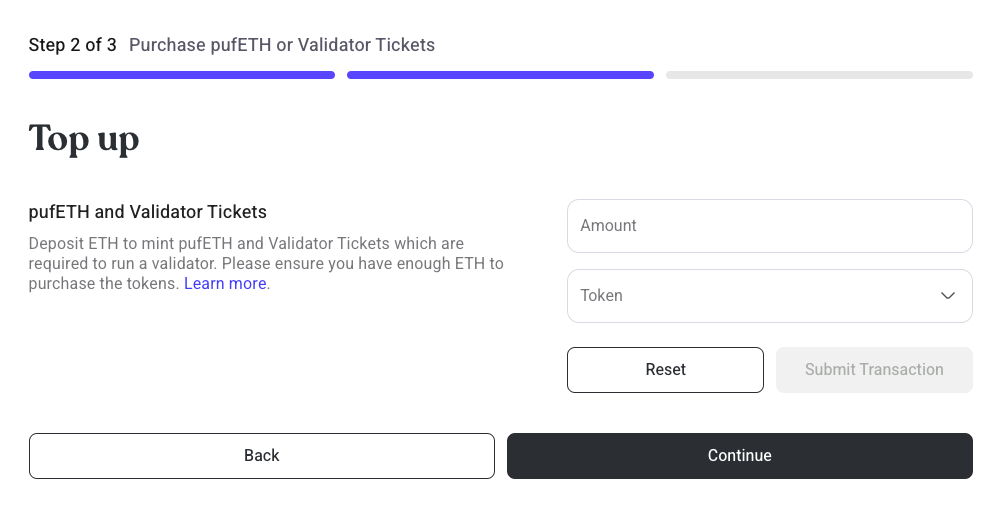
- Enclave users must deposit 1 ETH worth of pufETH to register
- Non-enclave users must deposit 2 ETH worth of pufETH to register
- A minimum of 28 Validator Tickets (VTs) are required to be deposited when registering a validator. The Guardians will exit validators if their VTs expire after 28 days without being refilled.
Step 4: Register Validator
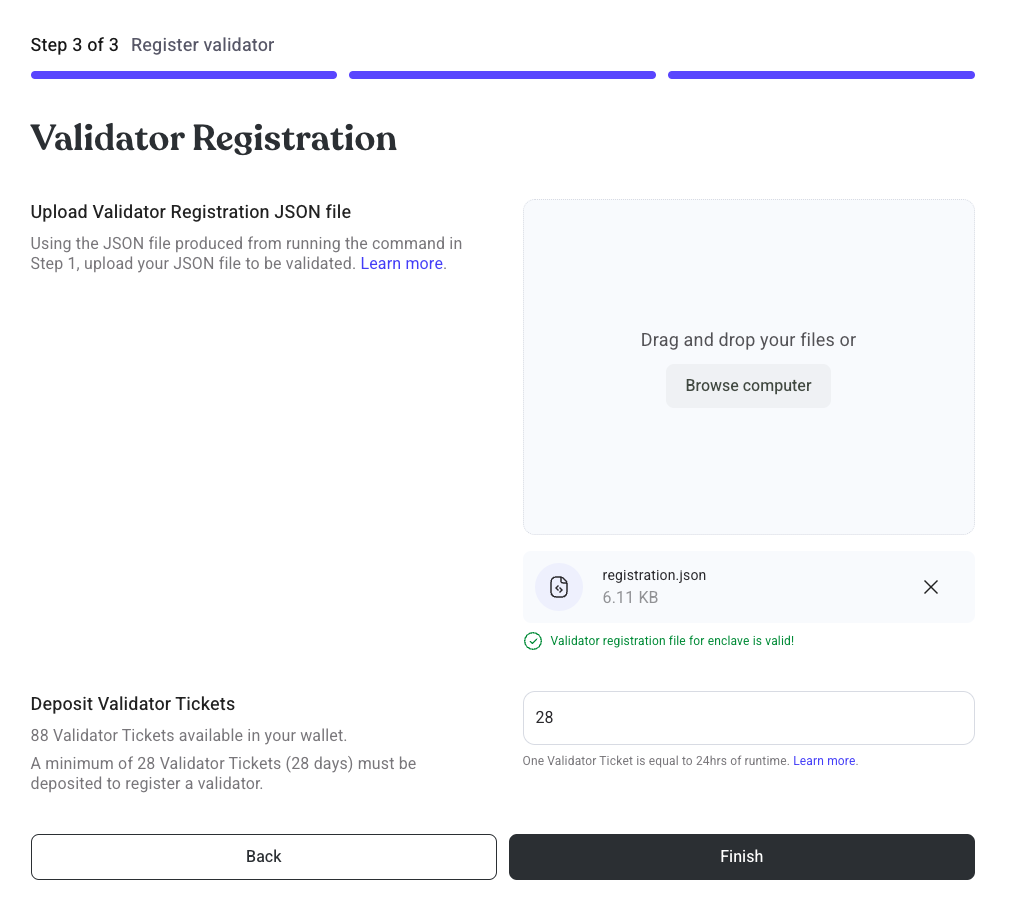
- Drag and drop your registration payload.
- Sign a
Permitmessage to deposit your VTs to the PufferProtocol contract - Sign a
Permitmessage to deposit your pufETH bond to the PufferProtocol contract - Sign the final transaction to register your validator
Step 5: Await Provisioning
The Guardians will provision pending validators when there is 32 ETH of liquidity in the PufferVault.
Invalid registrations will be skipped by the Guardians. The NoOp's bond will be returned but their VTs are penalized to prevent griefing.
Step 6: Prepare your Validator
Import validator keys to beacon/validator client:
Without Secure-Signer:
- Import your validator keys to Nimbus ↗
- Import your validator keys to Teku ↗
- Import your validator keys to Lodestar ↗
- Import your validator keys to Lighthouse ↗
- Import your validator keys to Prysm ↗
Using Secure-Signer Secure-Signer follows the same API as Web3Signer so the same instructions apply:
- Connect Secure-Signer to Nimbus ↗
- Connect Secure-Signer to Teku ↗
- Connect Secure-Signer to Lighthouse ↗
- Connect Secure-Signer to Prysm ↗
Make sure to set your fee_recipient value to your own wallet. Remember, Puffer takes no execution reward fees because of Validator Tickets!
Step 7: View your validators
Proceed to the Dashboard to view the validators registered to your wallet.
